
1. Write the production brief before drawing the layout
The crop determines the internal height, bay geometry, crop-support loads, irrigation zones, work aisles and climate targets. A tomato house designed for a long high-wire crop has different requirements from a nursery, leafy-green facility or seasonal soil-grown vegetable house.
Your production brief should state the crop and variety group, growing method, planting and harvest dates, target market, packaging format, expected labor model and whether expansion is planned. It should also distinguish gross floor area from net crop area. Roads, headhouses, tanks and service corridors are necessary, but they do not produce crops.
2. Complete site due diligence
Do not select a greenhouse orientation from a generic rule. Latitude, seasonal sun, prevailing wind, ridge vents, nearby obstacles and the chosen structure all matter. A local engineer should confirm wind and snow loads and the applicable code.
Map the site's high and low points, runoff direction, soil conditions, groundwater, access roads, overhead and underground utilities, shading obstacles and available power and water. Roof runoff becomes concentrated at the greenhouse edge, so gutters and a discharge route must be designed before foundations are placed. USDA NRCS site-planning material also calls out drainage, topography, water, electricity and permitting as early decisions. See its high tunnel site-selection fact sheet for a useful baseline, while following the code and engineering requirements for your commercial greenhouse.
| Site input | Design decision it affects | Evidence to provide |
|---|---|---|
| Climate | Vent area, cooling, heating, screens and covering | Hourly weather file or local design temperatures, humidity, solar radiation and wind |
| Wind and snow | Frame, bracing, foundation and operational limits | Code basis and values confirmed by a qualified local professional |
| Topography and drainage | Finished floor level, grading, gutters and water route | Topographic survey and stormwater requirements |
| Water | Storage, treatment, filtration and fertigation | Source capacity and laboratory water analysis |
| Power and fuel | Motor loads, pumps, cooling, heating and backup | Available voltage, phase, capacity, reliability and fuel options |
| Logistics | Gate width, turning radius, loading and construction sequence | Plot plan, road dimensions and delivery constraints |
3. Arrange the operational flow
A good layout reduces crossings between clean inputs, workers, harvested produce and waste. The exact flow depends on the crop and food-safety plan, but a useful starting sequence is:
- Controlled site entrance and staff hygiene area
- Input storage, water treatment and fertigation room
- Propagation or receiving area
- Separated production blocks with defined irrigation zones
- Harvest collection route
- Grading, packing and temporary cold storage
- Dispatch area that does not send trucks through clean production zones
- Separate waste and crop-residue route
Place frequently serviced equipment where technicians can reach it without walking through crop rows. Keep electrical equipment, fertilizer storage and chemical storage in code-compliant locations appropriate to the site. Biosecurity procedures should be designed with the grower and local crop adviser, not added after construction.
4. Divide the greenhouse into manageable zones
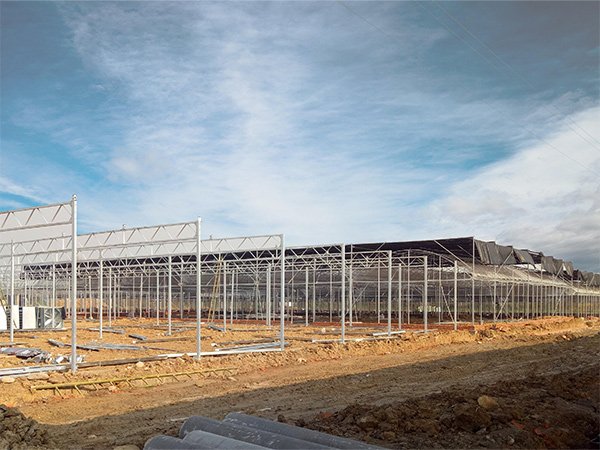
Do not make every bay one climate and irrigation zone by default. Consider crop age, variety, solar exposure, irrigation capacity and disease isolation. Smaller independent zones can improve control, but they add valves, sensors, wiring and management complexity. The right balance should follow the operating plan.
For each zone, record the growing area, crop-support system, irrigation flow, drainage return, sensor location and isolation method. If recirculation is planned, show how drain water is collected, treated and returned without mixing incompatible zones.
5. Size aisles, doors and support spaces from real movements
Start with the largest cart, pallet, lift or maintenance component that must pass through the facility. Add safe operating clearance, turning space and emergency access required by local rules. A narrow aisle may increase nominal crop area but slow every harvest and service task for the life of the project.
Confirm how motors, fans, pads, screens, gutters, pumps and control panels will be replaced. Equipment that fits during construction may become trapped after partitions and crop systems are installed.
6. Reserve a practical expansion direction
Future blocks need more than empty land. Preserve the road connection, drainage capacity, water and electrical routes, and space for larger tanks or utility equipment. Position the first headhouse so it can serve the planned final site, or document when a second support building will be needed.
7. Coordinate structure, climate and crop systems
The greenhouse frame, covering, ventilation, screens, irrigation and automation should be reviewed as one system. For example, an insect screen changes airflow resistance; a crop-support load acts on the structure; and a shade or energy screen needs space, drive equipment and controls. A layout is not ready for procurement until these interfaces are defined.
Automation is a choice, not a badge. Specify what is controlled, the sensors used, the operating logic, manual override, alarm method and response if power or communications fail.
8. Issue an RFQ package that suppliers can price consistently
- Dimensioned site plan and topographic information
- Crop and production brief
- Climate data and target indoor conditions
- Structural code, wind speed and snow load basis
- Water analysis and available flow
- Electrical and fuel information
- Required greenhouse, crop and environmental systems
- Required drawings, calculations, manuals and spare parts
- Delivery term, installation split and commissioning scope
- Acceptance tests, warranty and after-sales responsibilities
For budgeting, use the companion guide on commercial greenhouse cost scope. You can also review CFGET project examples and greenhouse structure options when preparing the brief.
Turn your site information into a design brief
Send the site location, plot dimensions, crop and production period to info@cfgreenhouse.com, or use the CFGET contact page. We will identify the missing inputs needed before equipment selection.