
You’ve got a passion for growing things. Maybe a backyard full of plants, maybe just a few herbs on your windowsill. But now you’re wondering—what if you took it a step further? What if you started your own greenhouse?
Whether it’s a side project or a step toward full-time farming, greenhouse agriculture is one of the most exciting ways to grow food today. It gives you control, extends your growing season, and helps protect your crops from the unpredictability of weather.
Why Choose Greenhouse Farming?
A greenhouse acts like a controlled bubble around your plants. It keeps out extreme weather, pests, and diseases, while keeping in warmth and humidity. You get more stability, more harvests per year, and more consistent quality.
Greenhouse farming helps reduce water waste, limit pesticide use, and extend crop availability into off-seasons. No wonder more people—from home gardeners to agri-tech startups—are jumping into it.
Step 1: Choose the Right Location
Before you build anything, pick your site wisely. A greenhouse needs good sunlight—at least 6 hours of direct light per day. Avoid placing it in the shadow of buildings or trees.
Make sure the ground is level and has good drainage. You'll also need access to water and electricity for irrigation, heating, and ventilation systems.
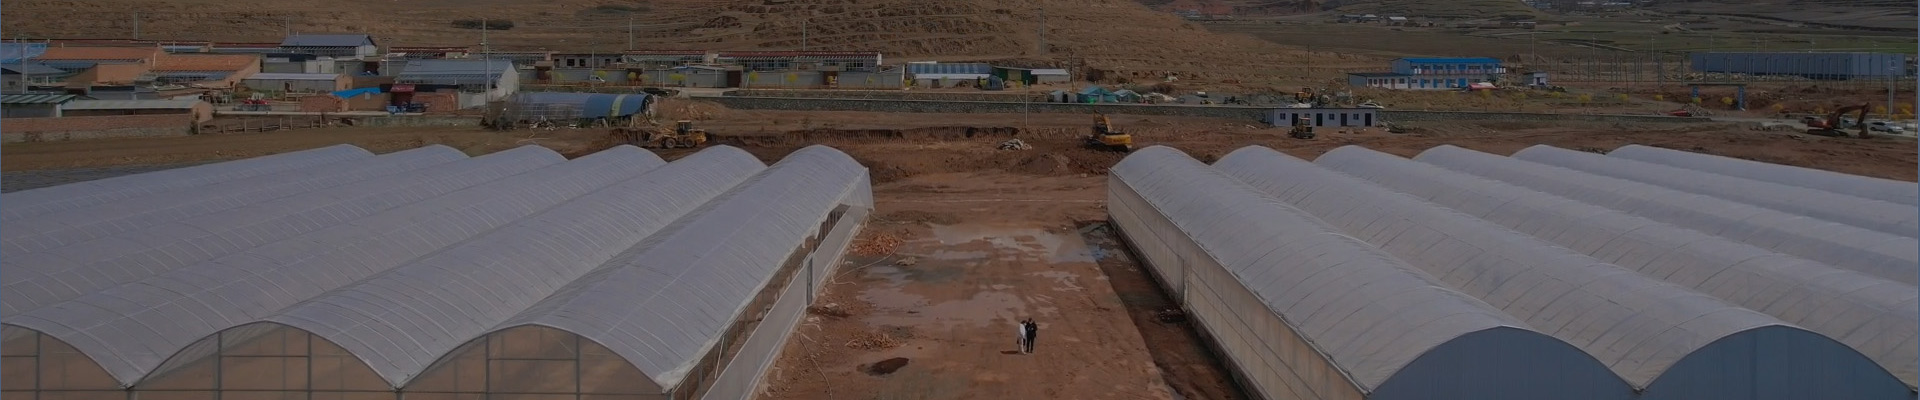
Rural farms have space, but even urban rooftops or backyards can work if space and sun are available. 成飞温室 (Chengfei Greenhouse) offers compact and modular greenhouses that are ideal for urban growers or space-limited sites.
So how do you actually get started? What do you need to know, buy, and plan before that first seed goes into the soil—or the hydroponic tray?
Let’s break it down step by step.
Step 2: Pick a Greenhouse Type
Not all greenhouses are the same. The structure you choose depends on your budget, goals, and space.
Common types include:
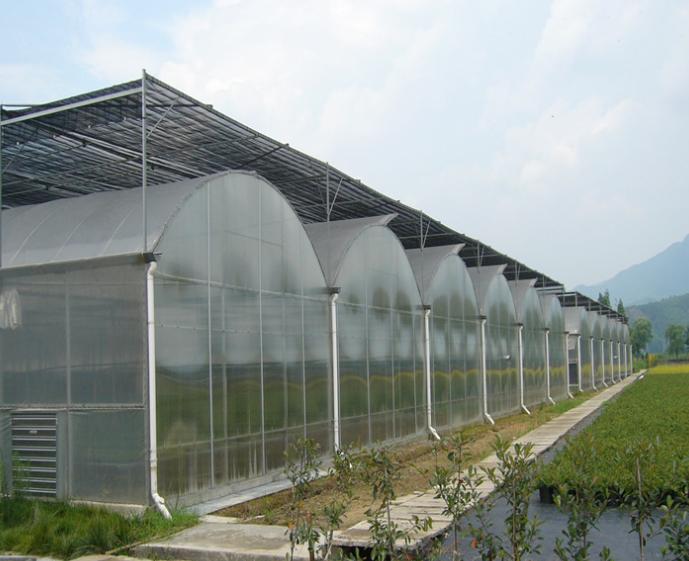
Tunnel (hoop house): Affordable and easy to install. Good for seasonal use.
Gothic arch: Stronger against snow and wind. Often used in cold climates.
Venlo glasshouse: High-tech, permanent structure. Great for large-scale operations.
Backyard or lean-to: Ideal for hobbyists or small-scale production.
Materials also matter. Plastic film is cheap and flexible. Polycarbonate panels last longer and offer better insulation. Glass looks great and lasts forever, but is expensive and heavy.
Step 3: Decide What to Grow
Start with crops that are profitable and well-suited for greenhouse conditions.
Beginner-friendly crops:
Leafy greens (lettuce, spinach, kale)
Herbs (basil, mint, coriander)
Tomatoes and cucumbers (with proper support)
Strawberries or bell peppers (with good light and ventilation)
Some greenhouse farmers focus on niche markets—like edible flowers, microgreens, or exotic herbs—to sell directly to restaurants or specialty stores.
Start small, then scale as you gain experience.
Step 4: Choose Your Growing System
You can grow in soil, or without it.
Soil-based: Simple and familiar. Good for beginners. Needs careful management of nutrients and disease.
Hydroponics: Plants grow in water with added nutrients. Faster growth, less water use. Popular for leafy greens.
Aquaponics: Combines fish farming with plant growth. Complex but sustainable. Suitable for experienced growers.
Vertical racks: Use shelves or layers to grow more in a small space. Best for compact greenhouses in urban areas.
Many first-time growers start with soil, then shift to hydroponics as they gain confidence.
Step 5: Install the Right Equipment
A greenhouse isn’t just walls and a roof—it’s a living system. To grow well, you’ll need:
Ventilation: Fans or vents to control temperature and humidity
Irrigation: Drip lines or misters for even watering
Shading: Cloths or screens to reduce light on hot days
Heating (in cold climates): Gas heaters, electric systems, or even compost heat beds
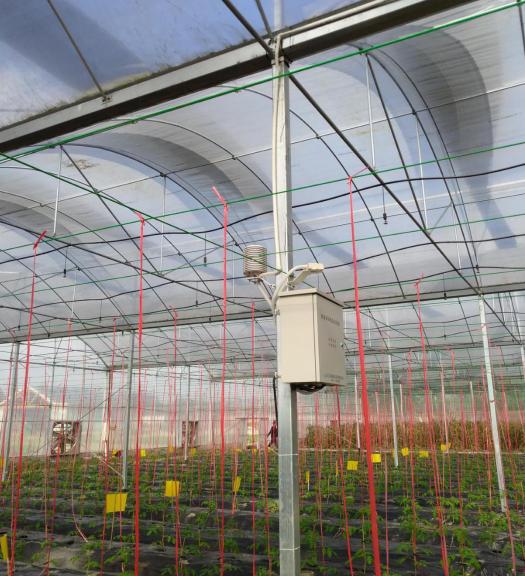
Monitoring tools: Thermometers, hygrometers, or automated sensors
Smart greenhouse tech is becoming more affordable. Some farmers now control their entire greenhouse climate from a mobile app.
Step 6: Plan Your Budget
Greenhouse farming can start small or scale big. Here’s a basic idea:
|
Item |
Estimated Cost (USD) |
| Basic structure (30 m²) | $800 – $1,500 |
| Irrigation system | $200 – $500 |
| Ventilation & fans | $150 – $400 |
| Heating system (if needed) | $300 – $1,000 |
| Starter seeds and trays | $100 – $300 |
Don’t forget recurring costs like electricity, water, nutrients, and labor (even if it’s your own time). Try to track costs and revenue from the beginning—it makes scaling easier later.
Step 7: Find a Market
Once your crops are growing, where will they go?
Options include:
Local farmers markets
Grocery stores
Farm-to-table restaurants
CSA boxes or subscription services
Selling online or via social media
Greenhouse-grown produce is often fresher and more visually appealing, which can attract premium buyers. Being local is a selling point—lean into it.
Step 8: Start Small, Then Grow
The key to success in greenhouse farming? Don’t try to build a giant operation overnight.
Start with one or two crops. Learn the systems. Test your market. Keep records. Then, as you gain experience, reinvest your profits into expanding.
Many successful farmers started with a 20-square-meter plastic tunnel in their backyard. Today, they operate commercial greenhouses and serve hundreds of customers.
Growing Smarter, Not Just Bigger
Greenhouse farming offers a rare combination of sustainability, scalability, and control. It’s perfect for beginners who want to grow food seriously—without relying completely on outdoor conditions.
With the right setup, planning, and patience, anyone can turn a patch of land—or a rooftop—into a thriving, green-filled oasis.
And with global demand for local, pesticide-free produce on the rise, there’s never been a better time to get growing.
Welcome to have a further discussion with us.
Email:Lark@cfgreenhouse.com
Phone:+86 19130604657
Post time: Jul-06-2025


 Click to Chat